Back to FAQ
General steps for setting up an email account on an iPhone
- To setup your iPhone first notfiy your email admin that you would like to enable ActiveSync on a specific mailbox.
- Download iPhone v.2.0 Update via iTunes.
Note: You do not need to download the update if the software version on your iPhone is 2.0 or higher. To view your current version, navigate to Home screen > Settings > General > About.
- Add the Exchange account on your iPhone, following the instructions below.
Important Notes
- When you configure a device to sync with Exchange, all existing calendar and contact information on the device is overwritten. Additionally, iTunes will no longer sync contacts and calendars with your desktop computer. However, you can still sync your device wirelessly using MobileMe services.
- You can configure only one Exchange account per device.
- Please make sure you are not connected via Wi-Fi. The iPhone will need to connect to the carrier's network directly.
Adding an Exchange account on the iPhone
To add an Exchange account on your iPhone:
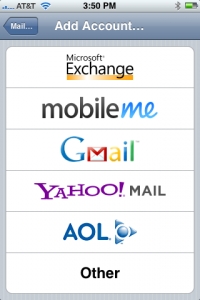 |
1. Go to Settings > Mail, Contacts, Calendars, then tap Add Account.
2. On the Add Account screen, tap Microsoft Exchange. |
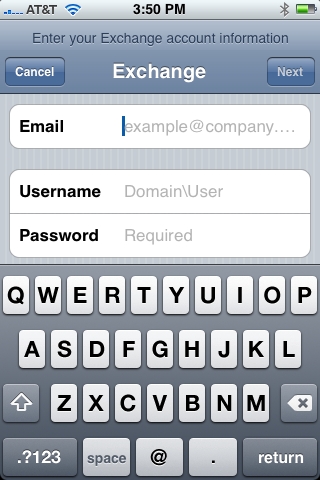 |
3. Enter the account information, then tap Next.
- Email: Enter the complete email address.
- Username: Use the format domain\username.
- If you have iPhone 2.1, there is a separate Domain field where you should specify the domain, and you should specify only the username in the Username field.
- Password: The password for the Exchange account.
- Description: A descriptive title that identifies this group of settings.
4. The Exchange server address is configured automatically. If the server address can’t be determined, you will be asked to enter it.
(The iPhone and the iPod Touch support Microsoft’s Autodiscovery service, which uses your username and password to determine the address of the front-end Exchange server.) |
 |
5. After the Exchange account is successfully configured, the server’s passcode policies are enforced. If the current passcode doesn’t comply with the Exchange ActiveSync policies, you will be prompted to change or set the passcode. The device won’t communicate with the Exchange server until a compliant passcode is set.
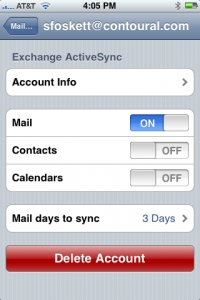
6. Next, the device offers to immediately sync with the Exchange server. If you choose not to sync at this time, you can turn on calendar and contact syncing later in Settings > Mail, Contacts, and Calendars.
- By default, Exchange ActiveSync pushes new data to your device as it arrives on the server. If you prefer to fetch new data on a schedule or to only pull new data manually, go to Settings > Fetch New Data to change the settings.
- To change how many day’s worth of data is synced to your device, go to Settings > Mail, Contacts, and Calendars. The default setting is three days.
- By default, the iPhone enables the Always BCC Myself setting. This means you will receive all messages sent from your iPhone in your Inbox. If you want to change this setting, navigate to Settings > Mail, Contacts, and Calendars > Always BCC Myself.
7. To complete the setup process, click SAVE and wait for the iPhone to test your incoming and outgoing mail settings and connect to your mailbox. |
Please note that not all Exchange features are supported. For example, the following features are not available:
- Folder management
- Opening links in email to documents stored on Sharepoint servers
- Task synchronization
- Setting an “out of office” autoreply message
- Creating meeting invitations
- Flagging messages for follow-up
Back to FAQ
|